
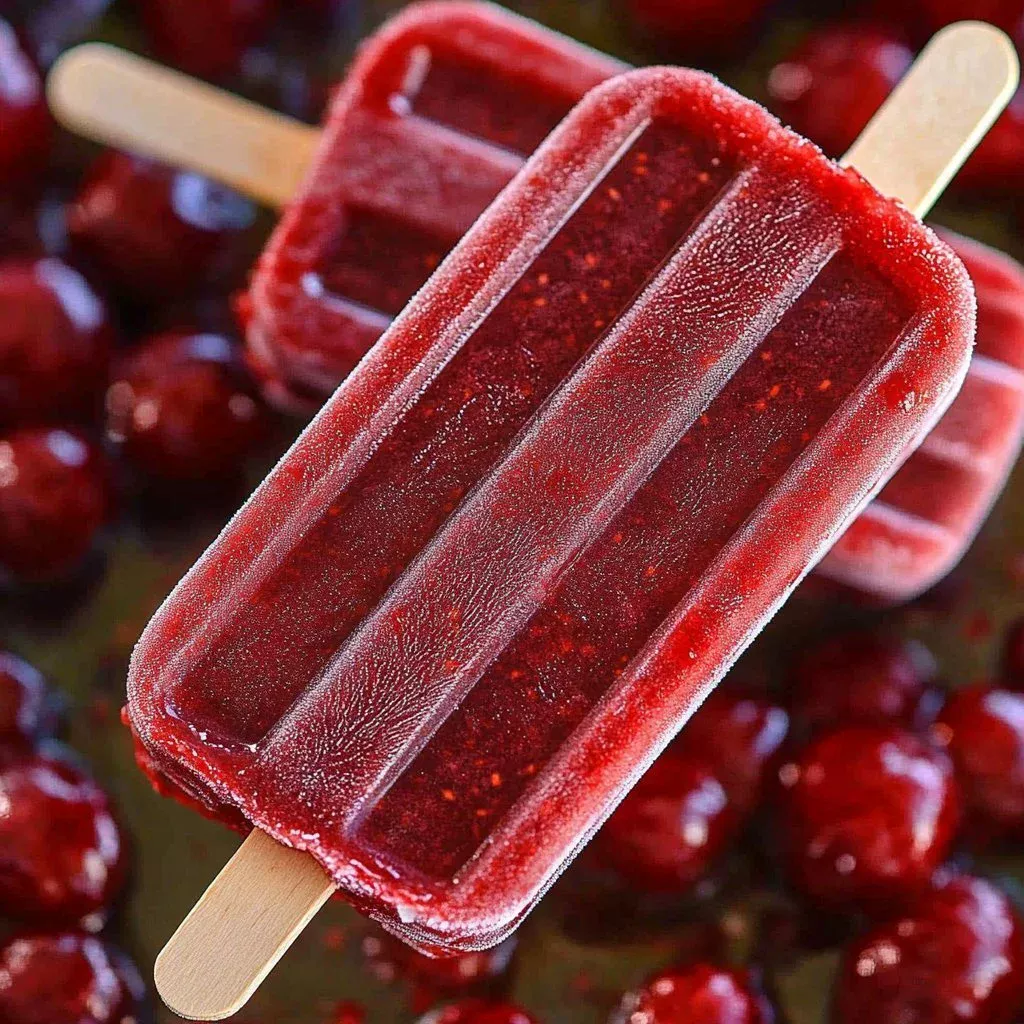
Homemade Cherry Ice Pops; a delightful treat that encapsulates the essence of summertime bliss. Bursting with the vibrant flavor of ripe cherries, these ice pops are both easy to make and offer a refreshing way to beat the heat. Whether you’re lounging by the pool or enjoying a picnic at the park, this recipe provides a quick and enjoyable solution for those cravings. With every step in this step-by-step guide, you’ll feel the joy of creating something that not only cools you down but also brings back fond memories.
Ingredients
To make your Homemade Cherry Ice Pops, you’ll need the following ingredients, each selected for their luscious and invigorating qualities:
- 2 cups frozen cherries: These tender, ruby-red jewels are naturally sweet and packed with flavor. Every bite reveals their juicy essence, making them the star of your ice pops.
- 1 cup water: Pure, crystal-clear water to help bring the smooth mixture together, allowing the cherry flavor to shine.
- 1-2 teaspoons honey or sweetener of choice: Opt for a light drizzle of honey or your preferred sweetener to enhance the fruity goodness while keeping it deliciously balanced.
Cooking Time & Tips for Homemade Cherry Ice Pops
Creating your Homemade Cherry Ice Pops can be quick and easy or slow and methodical, depending on your preparation style. If you’re looking for a speedy treat, use frozen fruits to skip the washing and chopping stages. This method allows you to whip up a batch of ice pops in just about 10 minutes of active time. On the other hand, if you’d like a more hands-on approach, you can prepare fresh cherries by pitting and chopping them beforehand, making the ice pops feel more customized and homemade.
Here are some practical tips for success:
- Make sure your cherries are fully frozen before starting for the best texture.
- If you prefer a sweeter ice pop, adjust the amount of sweetener to fit your taste.
- Don’t overfill your molds, as the mixture will expand during freezing.
Step-by-Step Directions
Let’s dive into the process of crafting your Homemade Cherry Ice Pops. Start by gathering your ingredients and equipment.
-
Get your high-speed blender: This gadget will help create that exquisite smoothness you desire.
-
Combine the ingredients: Add the frozen cherries and water into the blender, along with your chosen sweetener. This combination will soon transform into a vibrant cherry mixture.
-
Blend until smooth: Pulse the ingredients on high speed until you achieve a velvety consistency. The mixture should be smooth and aromatic, enticing your senses.
-
Pour into molds: Carefully pour the cherry mixture into ice pop molds, leaving just a small amount of space at the top. This space is crucial for the mixture to expand as it freezes.
-
Freeze: Place the molds in the freezer for at least 4 hours or overnight. Allowing enough time to freeze is key to getting that perfect ice pop texture.
-
Release and enjoy: When you’re ready to savor your pops, run warm water over the outside of the mold to release them easily. Then indulge in the refreshing flavor of your cherry ice pops!
Serving Suggestions & Occasions
Homemade Cherry Ice Pops are the perfect treat for various occasions. Whether you’re hosting a summer barbecue, planning a birthday party, or simply lounging on a sunny afternoon, these pops will certainly stir joy and refreshment. Pair them with your favorite picnic snacks or enjoy them alone as a guilt-free dessert. You can also serve them at family gatherings, where both kids and adults will relish their fruity sweetness!
Common Mistakes for Homemade Cherry Ice Pops
There are a few common pitfalls to avoid when making your Homemade Cherry Ice Pops:
- Not using frozen cherries: Fresh cherries will add extra water to the mixture, potentially leading to icy pops rather than creamy ones.
- Overfilling the molds: Always leave some space at the top of the molds; otherwise, you might end up with a mess in your freezer!
- Skipping the blending step: Take time to blend until you achieve a silky mixture. This guarantees a smooth texture in your final product.
Healthier Alternatives & Variations
Feel free to customize your Homemade Cherry Ice Pops for additional flavors or dietary needs. Here are some healthier alternatives and variations to enhance your icy treat:
- Nut milk: Substitute half of the water with almond milk or coconut milk for a creamier texture.
- Fresh fruit additions: Blend in slices of banana or mango to create a more diverse flavor profile.
- Greek yogurt: Incorporating Greek yogurt can add creaminess and protein, giving your pops a nutritional boost.
FAQs
-
Can I use fresh cherries instead of frozen?
Yes! Just pit and chop them and freeze them for a few hours before blending. -
How long do the ice pops last in the freezer?
They can last for up to 1-2 months if stored properly in an airtight container. -
What if I don’t have ice pop molds?
You can use small cups and insert sticks after the mixture is slightly frozen to hold them in place. -
Can I make these ice pops vegan?
Absolutely! Just use a plant-based sweetener like agave or maple syrup. -
What’s the best way to sweeten my ice pops?
Honey works well, but feel free to experiment with other sweeteners like stevia or agave syrup, adjusting to your desired sweetness. -
How can I make these ice pops more flavorful?
Adding a splash of lemon or lime juice can enhance the flavor profile and give it a zesty kick!
Conclusion
Now that you have all the details you need to whip up your Homemade Cherry Ice Pops, it’s time to put this refreshing recipe to the test. Wield your high-speed blender and embrace the joy of making a treat that’s as delightful as it is easy. Whether enjoying them under the sun or sharing them with loved ones, these cherry ice pops are bound to become a favorite! Don’t wait—try making them today and indulge in their bright, fruity charm!
Homemade Cherry Ice Pops
Ingredients
Main Ingredients
- 2 cups frozen cherries Naturally sweet and packed with flavor.
- 1 cup water Pure, crystal-clear water to bring the mixture together.
- 1-2 teaspoons honey or sweetener of choice Adjust according to taste.
Instructions
Preparation
- Gather your ingredients and equipment.
- Get your high-speed blender ready.
- Add the frozen cherries and water into the blender, along with your chosen sweetener.
- Pulse the ingredients on high speed until you achieve a velvety consistency.
- Carefully pour the cherry mixture into ice pop molds, leaving a small amount of space at the top.
- Place the molds in the freezer for at least 4 hours or overnight.
- When ready, run warm water over the outside of the mold to release the ice pops.