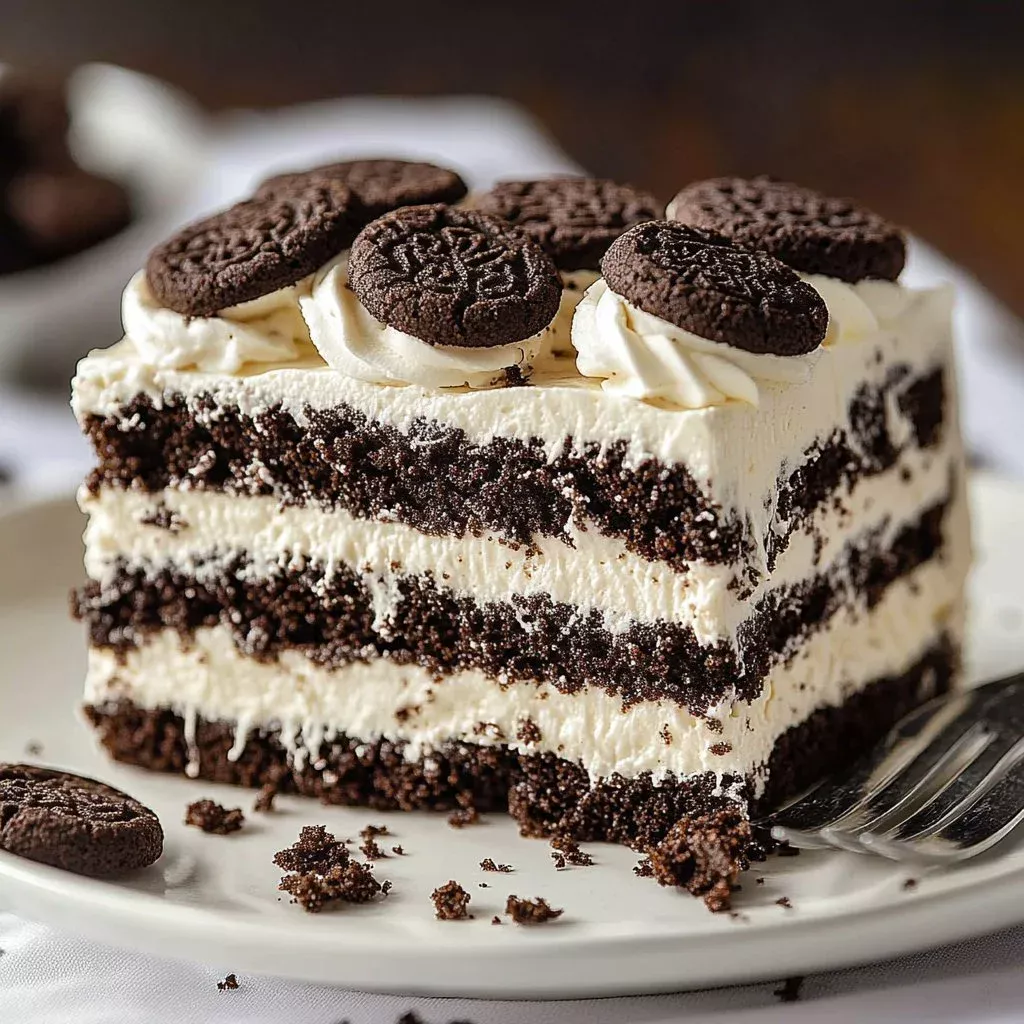
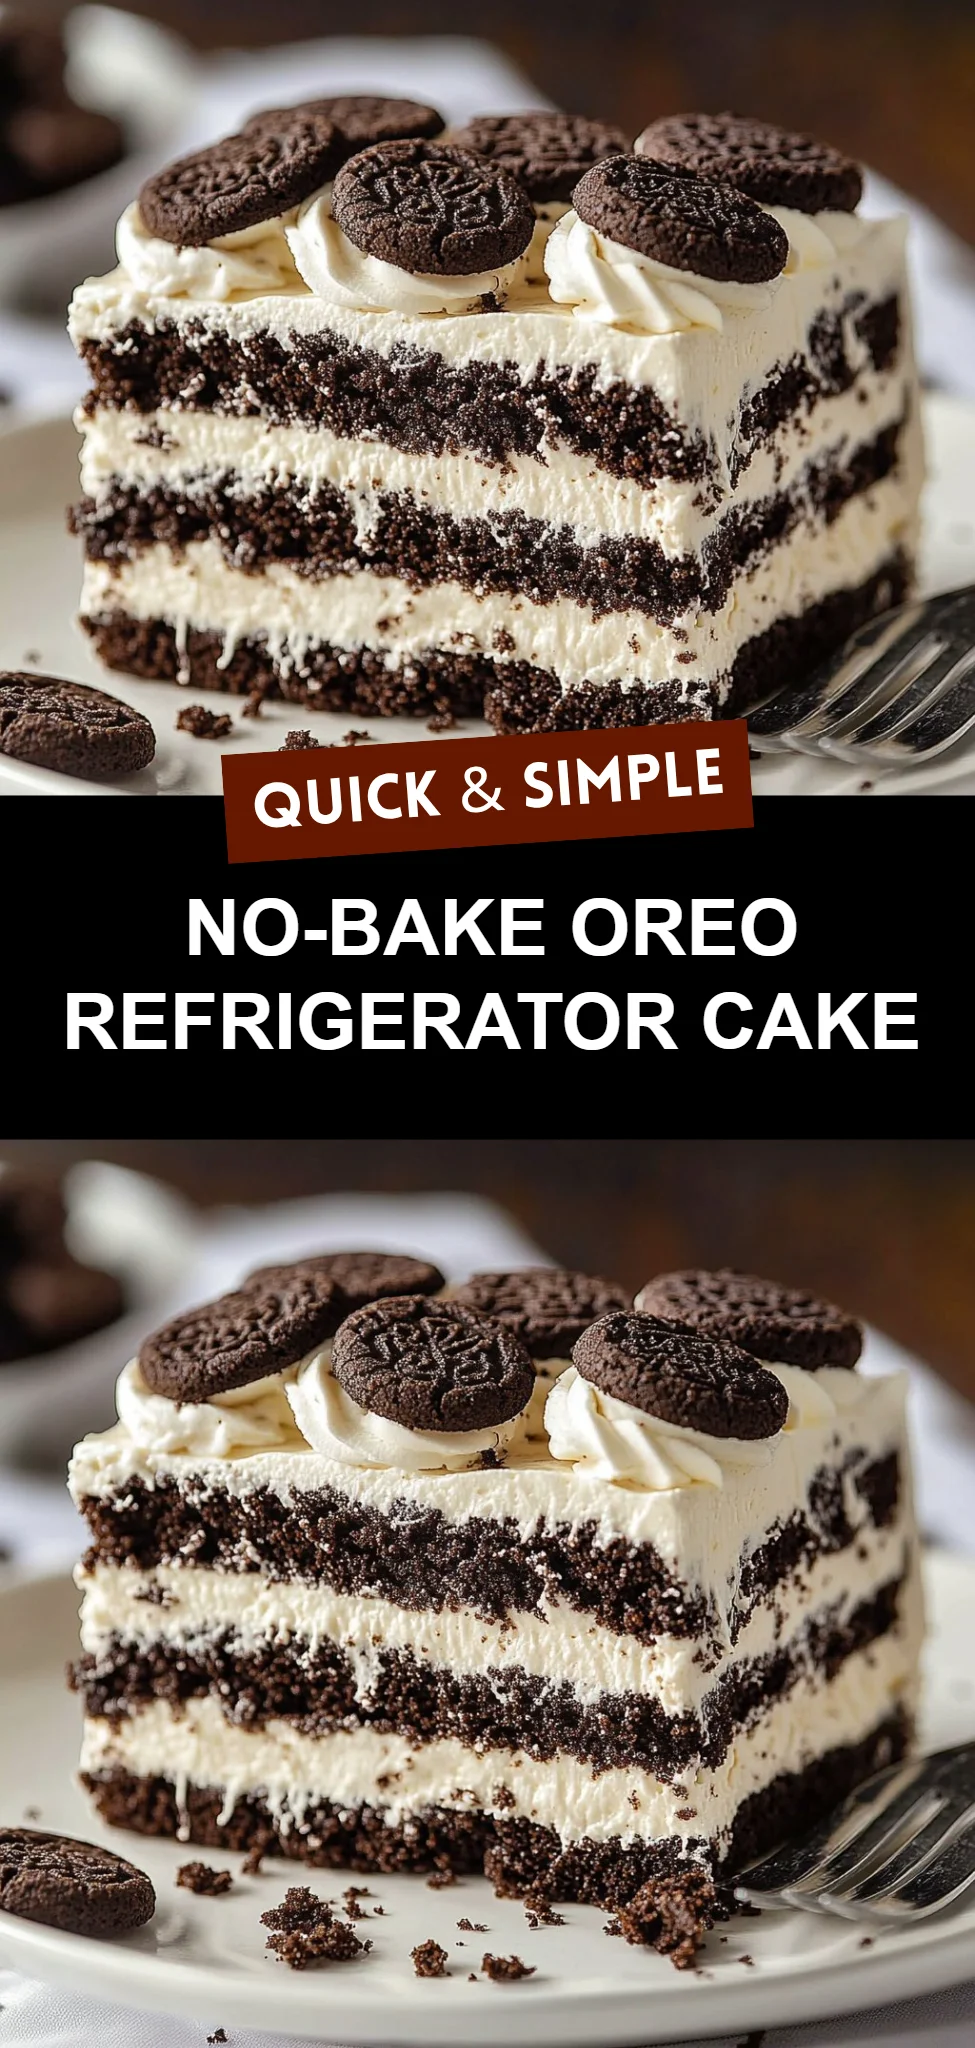
Oreo Icebox Cake is a delightful dessert that combines the rich, creamy flavor of whipped cream with the nostalgic crunch of Oreo cookies. This no-bake treat is perfect for family gatherings or a cozy evening at home. With its indulgent layers and a hint of vanilla, each bite transports you to a place of comfort and joy, making it an irresistible choice for both kids and adults alike. This recipe is incredibly easy to prepare and promises to impress your guests. Follow this step-by-step guide to create your own Oreo Icebox Cake.
Ingredients
You’ll need the following ingredients to whip up this satisfying dessert:
- 2 cups heavy whipping cream: This will provide that luxurious, creamy texture that melts in your mouth.
- 1 cup powdered sugar: Sweet and light, it balances perfectly with the richness of the cream.
- 1 tablespoon vanilla extract: Aromatic and warm, it adds depth and character to the cake.
- 30 whole Oreos: Crispy and chocolaty, these cookies form the heart of the dish with their iconic taste.
- 12 crushed Oreos (for garnish): These will provide a delightful crunch and visual appeal on top.
Step-by-Step Directions
-
Whip the Cream: In a mixing bowl, whip the heavy cream, powdered sugar, and vanilla extract with an electric mixer until it forms stiff peaks, which should take about 7-8 minutes. Your mixture should be thick and fluffy, a perfect base for layering.
-
Layer the Oreos: Begin by layering whole Oreos on the bottom of an 8×8 baking dish. Make sure they sit snugly together to create a solid foundation.
-
Spread the Whipped Cream: Take half of the whipped cream mixture and spread it evenly over the Oreos, ensuring that every cookie is coated well.
-
Add More Oreos: Next, add another layer of whole Oreos on top of the whipped cream mixture. It’s essential for the texture and flavors to meld beautifully.
-
Top it Off: Spoon the remaining whipped cream mixture over the second layer of Oreos, letting it settle comfortably in place.
-
Refrigerate: Cover the dish with plastic wrap and refrigerate for at least 8 hours or overnight. This step is crucial as it allows the cookies to soften and absorb the cream’s flavors.
-
Garnish: Before serving, sprinkle the crushed Oreos on top to add an eye-catching finish and an extra crunch.
Tips & Tricks
To elevate your Oreo Icebox Cake, consider adding a layer of chocolate or caramel sauce between the Oreo layers for an unexpected twist. Alternatively, for a hint of freshness, folding in some crushed fruit, like strawberries or raspberries, into the whipped cream can provide a lovely balance to the dessert. If you’re feeling adventurous, try using different flavored cookies for unique variations!
Serving Suggestions & Pairings
This cake shines on its own, but it pairs beautifully with a scoop of vanilla ice cream or a drizzle of chocolate sauce. It makes for a fantastic centerpiece at birthday parties, family reunions, or potlucks. Serve it alongside a hot cup of coffee or cold glass of milk for the ultimate indulgent experience.
Nutritional Information
Each serving of Oreo Icebox Cake contains approximately 350 calories, with about 20 grams of fat, and 30 grams of carbohydrates. While it’s certainly a treat, it’s best enjoyed in moderation. Remember, balance is key in any diet!
Storing Tips & Variations
Store your Oreo Icebox Cake in an airtight container in the refrigerator for up to 3 days. If you want to make it ahead of time, it also freezes well; just ensure you wrap it tightly in plastic wrap. For variations, consider experimenting with different cookies, like chocolate mint or peanut butter Oreos, to complement the creamy layers.
Conclusion
Oreo Icebox Cake is not only simple to make but also incredibly rewarding in terms of flavor and nostalgia. It’s a true crowd-pleaser that beckons back to childhood memories and moments shared with loved ones. Try this recipe today and celebrate the joy it brings, then share your experience with friends and family!
FAQs
-
Can I make Oreo Icebox Cake in advance?
Yes! In fact, this cake is best when made the day before serving as it allows the flavors to meld and the cookies to soften. -
What kind of whipped cream should I use?
Heavy whipping cream is recommended for the best texture. You can also use store-bought whipped topping if you prefer convenience. -
Can I use reduced-fat Oreos or whipped cream?
While you can use reduced-fat ingredients, the texture and flavor may not be as rich. The traditional versions give a more satisfying taste. -
Can I add fruit to the cake?
Absolutely! Fresh or crushed fruit can be folded into the whipped cream for added flavor and nutrition. Berries work particularly well. -
How long does the cake last?
Storing the cake in an airtight container in the refrigerator will keep it fresh for up to 3 days. However, for the best flavor, it’s recommended to consume it within the first day or two after making.

Oreo Icebox Cake
Ingredients
Main ingredients
- 2 cups heavy whipping cream Provides a luxurious, creamy texture.
- 1 cup powdered sugar Balances perfectly with the richness of the cream.
- 1 tablespoon vanilla extract Adds depth and character to the cake.
- 30 whole Oreos Forms the heart of the dish with their iconic taste.
- 12 crushed Oreos (for garnish) Provides a delightful crunch on top.
Instructions
Preparation
- In a mixing bowl, whip the heavy cream, powdered sugar, and vanilla extract with an electric mixer until it forms stiff peaks, about 7-8 minutes.
- Layer whole Oreos on the bottom of an 8x8 baking dish, ensuring they sit snugly together.
- Spread half of the whipped cream mixture evenly over the Oreos.
- Add another layer of whole Oreos on top of the whipped cream mixture.
- Spoon the remaining whipped cream mixture over the second layer of Oreos.
- Cover with plastic wrap and refrigerate for at least 8 hours or overnight.
- Before serving, sprinkle crushed Oreos on top.