
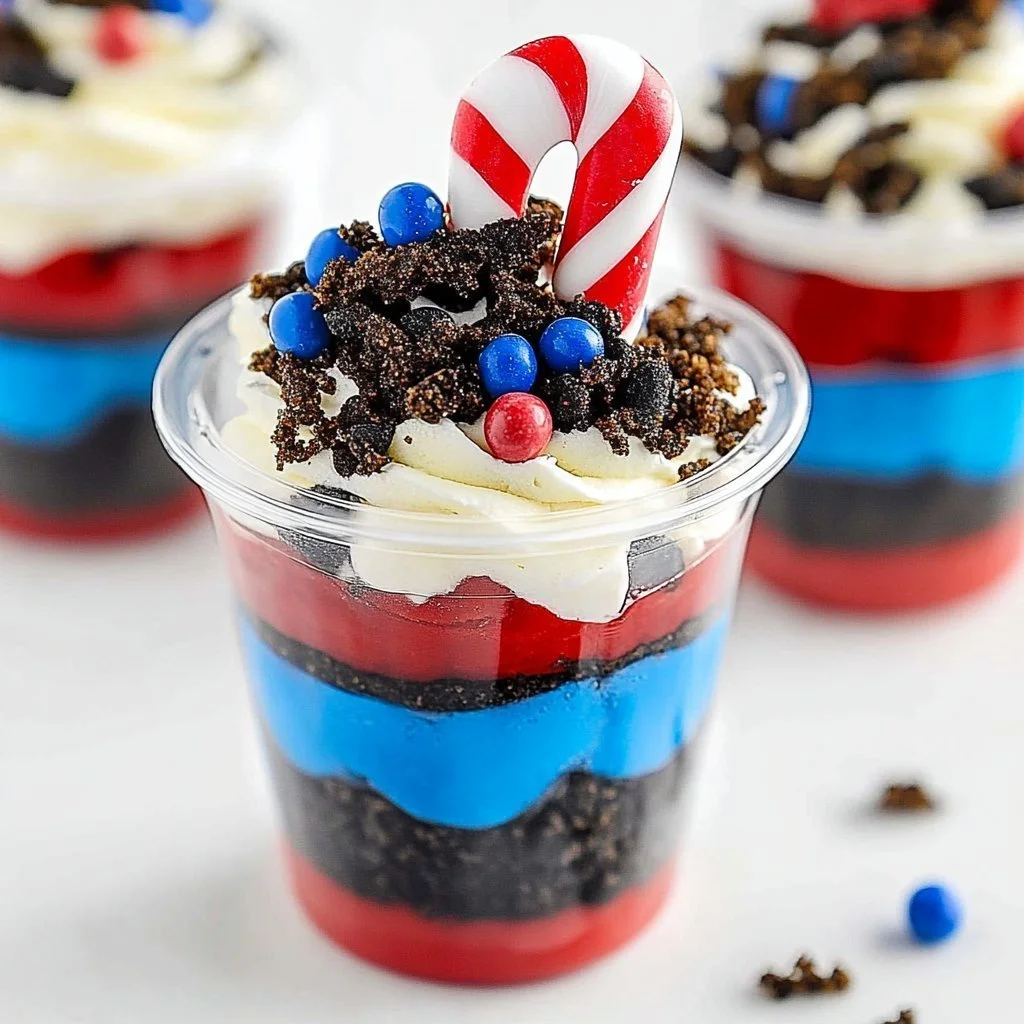
Red, White and Blue Dirt Cups are a delightful and visually captivating dessert that’s perfect for summer gatherings, barbecues, or patriotic celebrations. This fun recipe brings together layers of creamy cheesecake pudding and Oreo cookies, creating a treat that’s not only delicious but also a feast for the eyes. With the vibrant red and blue hues, these cups evoke a sense of nostalgia and festivity, making them a family-favorite that everyone will love. Best of all, they are quick to prepare, allowing you to enjoy the sweet moments with your loved ones without spending hours in the kitchen.
Ingredients
To make the mouthwatering Red, White and Blue Dirt Cups, you will need:
- 2 boxes of creamy cheesecake pudding (3.4 ounces each)
- 4 cups of cold, rich milk
- 19 Oreo cookies, crushed to a sandy texture that adds a perfect crunch
- ¼ teaspoon of bright red gel food dye for a vibrant hue
- ¼ teaspoon of deep blue gel food dye to achieve that patriotic color
- 8 festive red and blue gummy worms for decoration, bringing fun and whimsy to your dessert
Cooking Time & Tips For Red, White and Blue Dirt Cups
Making Red, White and Blue Dirt Cups can be a quick endeavor, typically taking about 20-30 minutes for preparation. You can whip them up in no time for unexpected guests or festive occasions. The secret to achieving the perfect layers lies in your patience; take time to ensure the pudding thickens properly for a delightful texture.
If you’re looking for a quicker option, prepare the pudding in advance and refrigerate it until you’re ready to assemble the cups. For best results, remember to use cold milk when mixing the pudding to achieve that luxurious, creamy consistency. Be sure to crush your Oreos finely for easy layering, and don’t be afraid to get creative with the gummy worm placement—it adds a whimsical touch that children adore!
Step-by-Step Directions
-
In a large mixing bowl, combine both boxes of cheesecake pudding with the cold, rich milk. This creamy base is the heart of your dessert, so mix it well!
-
Whisk the mixture until thickened, resulting in a smooth, velvety consistency that makes your mouth water in anticipation.
-
Divide the luscious pudding mixture into two separate bowls, setting the stage for your vibrant layers.
-
In one bowl, add the red gel food dye, stirring until you achieve a vibrant hue, while in the other bowl, add the blue gel food dye, mixing until evenly colored. These colors will bring a festive charm to your dessert.
-
Begin layering your cups: start with a generous layer of the sandy crushed Oreos at the bottom, forming a crunchy foundation.
-
Spoon in the blue pudding layer, followed by more crushed Oreos to create that irresistible crunch throughout.
-
Add a layer of the white pudding for creamy goodness, and finally, top it off with the vibrant red pudding layer, creating a beautiful visual contrast.
-
For the finishing touch, sprinkle additional crushed Oreos on top and place your festive gummy worms strategically for decoration before serving, transforming your dessert into a playful masterpiece.
Serving Suggestions & Occasions
Red, White and Blue Dirt Cups are not just a visual delight; they are the perfect centerpiece for any gathering! Serve them at Fourth of July barbeques, family reunions, or birthday parties. They also make a great addition to potlucks or casual picnics, where their portable cups allow guests to grab one easily. To elevate the presentation, consider serving them in clear plastic cups or mason jars, showcasing the beautiful layers while making cleanup a breeze.
Common Mistakes For Red, White and Blue Dirt Cups
While this recipe is simple, there are a few common pitfalls to avoid for achieving the best result. First, ensure that your pudding mixture sets properly; this requires whisking until thickened and not skimming on the chilling time. Second, when layering, be mindful of how much Oreo you use; too much can overwhelm the pudding layers, while too little can lead to a lackluster dessert. Lastly, when adding food dye, start with a small amount and gradually increase; you can always add more but can’t take it out once mixed!
Healthier Alternatives & Variations
For those looking to lighten up this treat, consider using sugar-free pudding mix and low-fat milk. You can also swap regular Oreos for whole grain or gluten-free versions to accommodate dietary needs. If you prefer a fruitier twist, try layering in some fresh strawberries or blueberries between the layers for added freshness. Another fun variation could include adding whipped cream on top for an extra flourish or mixing in a layer of fruit puree for a refreshing twist.
FAQs
-
Can I prepare these in advance?
Yes! You can prepare the pudding and layer the cups a day ahead. Just ensure they’re kept covered in the fridge until serving. -
What can I use instead of gummy worms for decoration?
You can use fresh fruit, chocolate-covered pretzels, or even sprinkles for a different look! -
How long do the dirt cups last in the fridge?
They can be stored in the refrigerator for up to 3-4 days, but they are best enjoyed fresh. -
Can I make this dessert vegan?
Absolutely! Use plant-based milk and a dairy-free pudding mix to create a vegan-friendly version. -
What kind of cups work best for serving?
Clear plastic cups or mason jars are perfect for showcasing the beautiful layers. -
Can I freeze these dirt cups?
Freezing is not recommended as it can alter the texture of the pudding once thawed.
Conclusion
Red, White and Blue Dirt Cups are a delightful treat that effortlessly combines flavor and festivity, making them a must-try for your next gathering. The vibrant colors and delicious layers will not only satisfy your sweet tooth but also create lasting memories with family and friends. If you haven’t tried making these yet, now’s the perfect time! Grab your ingredients, follow the simple recipe, and create a dessert that will have everyone asking for seconds. Enjoy the joy and sweetness that comes with every bite of these charming cups!
Red, White and Blue Dirt Cups
Ingredients
Pudding Base
- 2 boxes creamy cheesecake pudding (3.4 ounces each)
- 4 cups cold, rich milk Use cold milk for best results.
Layers and Decoration
- 19 pieces Oreo cookies, crushed Crushed to a sandy texture.
- 1/4 teaspoon bright red gel food dye For vibrant red color.
- 1/4 teaspoon deep blue gel food dye For vibrant blue color.
- 8 pieces festive red and blue gummy worms For decoration.
Instructions
Preparation
- In a large mixing bowl, combine both boxes of cheesecake pudding with the cold, rich milk. Mix well.
- Whisk the mixture until thickened, resulting in a smooth, velvety consistency.
- Divide the pudding mixture into two separate bowls.
- In one bowl, add the red gel food dye and stir until vibrant. In the other bowl, add the blue gel food dye and mix until evenly colored.
Assembly
- Start layering your cups: begin with a layer of crushed Oreos at the bottom.
- Spoon in the blue pudding layer, followed by more crushed Oreos.
- Add a layer of the white pudding, then top it off with the red pudding layer.
- Sprinkle additional crushed Oreos on top and place gummy worms for decoration before serving.